World Map: Difference between revisions
No edit summary |
Cleanup |
||
| Line 2: | Line 2: | ||
<translate> | <translate> | ||
<!--T:1--> | <!--T:1--> | ||
World map is an {{pll|Items Overview|item}} that shows the entire railway network of Derail Valley, along with | World map is an {{pll|Items Overview|item}} that shows the entire railway network of Derail Valley, along with stations and {{pll|Service Point Overview|service points}}. The map legend in the lower-left corner of the map explains how to differentiate them. | ||
<!--T:2--> | <!--T:2--> | ||
On the map the station names are abbreviated. | On the map the station names are abbreviated to standardized codes. Expanded version of the map found in {{pll|Station Office|station offices}} features a legend, listing their full names. | ||
<!--T:3--> | <!--T:3--> | ||
Depending on the session {{pll|Difficulty|difficulty settings}}, | Depending on the session {{pll|Difficulty|difficulty settings}}, your position and orientation is marked by a cyan arrow, and {{pll|Rail Vehicle Types|motorized rail vehicles}} are marked by yellow arrows. Alternatively, a {{pll|Compass|compass}} can be used to navigate. | ||
Also difficulty dependent, it is possible to fast travel to any station in the valley by clicking on its pin on the world map. The {{pll|Wallet & Money|cost}} of fast travel may depend on the distance, and whether you travel alone or with a vehicle. If you have multiple locomotives in a {{pll|Multiple-Unit|multiple-unit}} setup, they will all travel with you. Fast traveling may advance {{pll|Time of Day|time}}, depending on the session difficulty settings, too. | |||
<!--T:5--> | <!--T:5--> | ||
| Line 17: | Line 16: | ||
<!--T:6--> | <!--T:6--> | ||
This | This item is acquired at the very start of the session, and can be {{pll|Item Retrieving|force-retrieved}} if lost, using the inventory. | ||
</translate> | </translate> | ||
[[Category:Equipment|3]] | [[Category:Equipment|3]] | ||
Revision as of 17:57, 6 March 2025
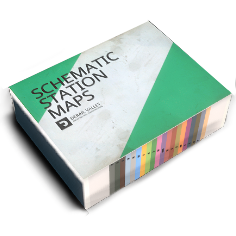
World map is an item that shows the entire railway network of Derail Valley, along with stations and service points. The map legend in the lower-left corner of the map explains how to differentiate them.
On the map the station names are abbreviated to standardized codes. Expanded version of the map found in station offices features a legend, listing their full names.
Depending on the session difficulty settings, your position and orientation is marked by a cyan arrow, and motorized rail vehicles are marked by yellow arrows. Alternatively, a compass can be used to navigate.
Also difficulty dependent, it is possible to fast travel to any station in the valley by clicking on its pin on the world map. The cost of fast travel may depend on the distance, and whether you travel alone or with a vehicle. If you have multiple locomotives in a multiple-unit setup, they will all travel with you. Fast traveling may advance time, depending on the session difficulty settings, too.
The map features a loose coordinate system along the left and top edges, which can help locate owned vehicles with coordinates given by the career manager.
This item is acquired at the very start of the session, and can be force-retrieved if lost, using the inventory.
